Below are common questions and concerns with their solutions relating to installing and activating CardioLog Analytics.
| Questions or Concerns | Solutions |
|---|---|
Is CardioLog Analytics available as SaaS? | CardioLog Analytics is available both as an on-premise solution and as a SaaS solution (software as a service). For more information please visit our website - http://www.intlock.com/intlocksite/productsandservices/cardiolog-analytics-saas-on-demand.asp |
What are the CardioLog installer prerequisites? | The CardioLog installer requirements can be found here, and the permissions required can be found here. |
Which CardioLog Analytics Installer should be used with Support for SQL 2014? | When using SQL 2014, please download the following CardioLog Analytics installer - version 2.0.8.3: |
Why do I get the following error "This implementation is not part of the Windows Platform FIPS validated cryptographic algorithms" when I launch CardioLog? | This issue may occur when a security policy with Federal Information Processing Standards (FIPS) is enforced on the server. To resolve this issue, you will have to disable the FIPS Algorithm Check in the registry.
|
Why do I get the following error "HTTP Error 403.1 - Forbidden" when I launch CardioLog? | When you launch CardioLog, do you receive an error message that resembles the following: HTTP Error 403.1 - Forbidden This problem occurs when CardioLog is hosted with Internet Information Services (IIS) 7.0 and the appropriate script handler permission or executable handler permission are not set for the CardioLog directory where the requested resource resides. To resolve this issue, follow these steps:
|
Why do I get the error "This app can't run on your PC" when I run the setup file? | This issue occurs when the setup file is corrupted, or not suitable for the operating system platform. In order to resolve this issue,
|
How do I complete my installation and optimize my system? | Please perform the following steps to complete the product configuration and ensure system health: A. System Requirements Verify that your system meets the minimum hardware and software requirements. B. Usage Data Collection
C. System Configuration and Monitoring
D. Optimization and Fine Tuning The fine tuning process is essential to ensure accurate and useful data. It is highly recommended to perform this process 2-3 weeks after the initial installation on the production environment.
|
Why does the tracking agent pop-up not show up when I click Ctrl+F12, or the Agent Console shows up without any content? | In order to troubleshoot data collection issues, see the complete troubleshooting guide. |
Why do I receive an error in Agent Console ("CardioLog" tab)? | In order to troubleshoot data collection issues, see the complete troubleshooting guide. |
What are the required web server (IIS) role services? | Follow the following role services installation instructions depending on your server operating system: Windows Server 2012, Windows Server 2012 R2:
Windows Server 2008:
Windows Server 2008 R2
|
Which ports are used by CardioLog? | CardioLog includes several system components which access multiple ports, including:
|
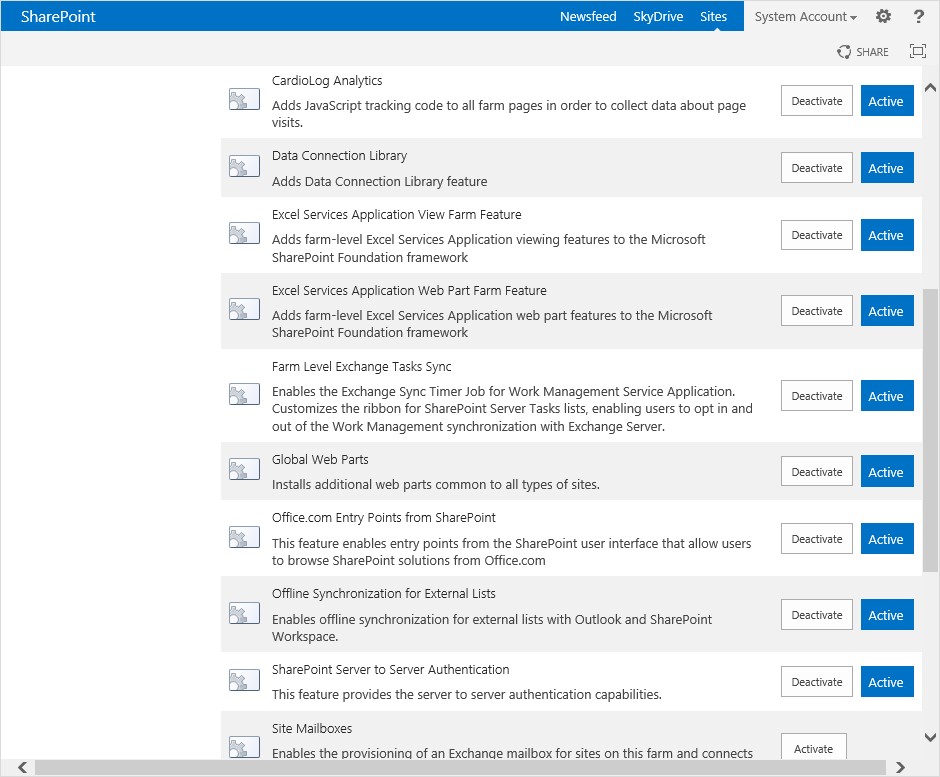
"CardioLog Analytics" SharePoint Feature Manual Installation Procedure | OverviewCardioLog Analytics provides a SharePoint solution (cardiologtrackingagentfeature.wsp) for installing the JavaScript tracking code on all farm pages. This SharePoint solution includes a farm-scoped feature named CardioLog Analytics, which can be activated or deactivated through SharePoint's Central Administration. The deployment of the SharePoint solution is done automatically through step 2 of the CardioLog Analytics configuration wizard. The wizard should run with SharePoint farm administrator privileges. In this article you can find details on the manual installation procedure.
Deployment ProcedureInstalling the CardioLog Tracking Agent web application
Installing the "CardioLog Analytics" SharePoint Feature
cd C:\Program Files\Common Files\Microsoft Shared\Web Server Extensions\1X\BIN
stsadm.exe -o addsolution -filename "C:\Program Files\Common Files\Microsoft Shared\Web Server Extensions\1X\BIN\CardioLogTrackingAgentFeature.wsp"
stsadm.exe -o deploysolution -name CardioLogTrackingAgentFeature.wsp -immediate -allowgacdeployment
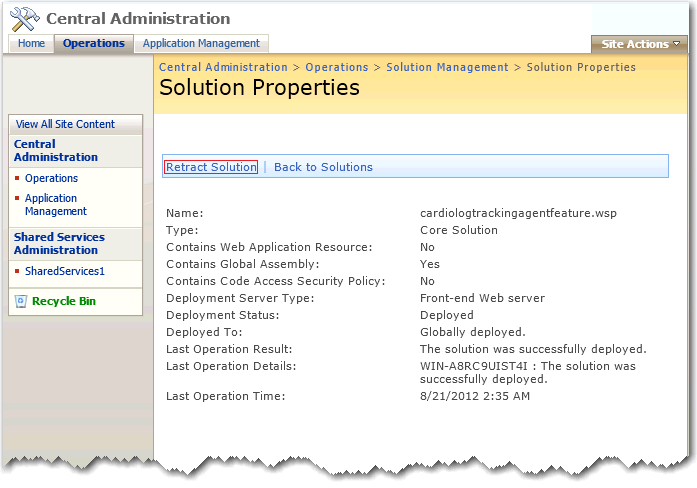
stsadm.exe -o activatefeature -name CardioLogAnalytics -force To view the deployed solution in SharePoint 2013, go to Central Administration > System Settings > Manage farm solutions  SharePoint 2013 - Solution Management In the Solution Properties, click cardiologtrackingagentfeature.wsp and verify that the solution was successfully deployed to all web front ends. 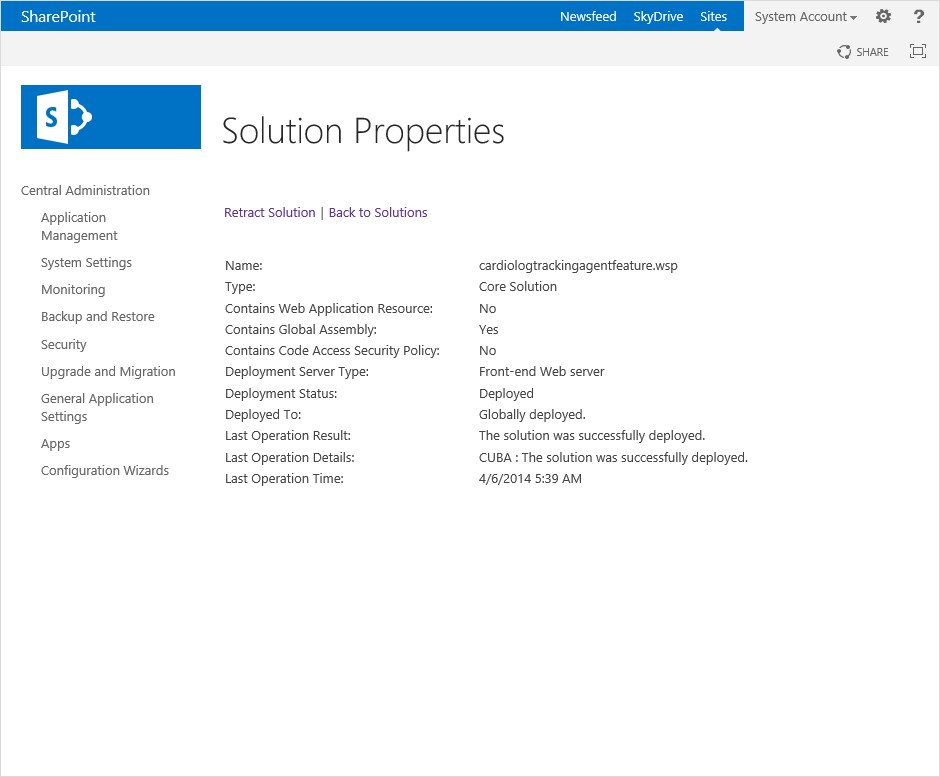 SharePoint 2013 - Solution Properties To view the deployed solution in SharePoint 2010, go to Central Administration > System Settings > Manage farm solutions 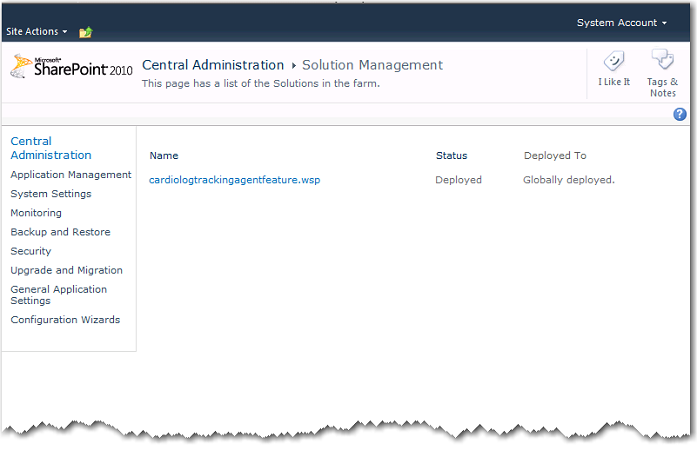 SharePoint 2010 - Solution Management In the Solution Properties, click cardiologtrackingagentfeature.wsp and verify that the solution was successfully deployed to all web front ends. 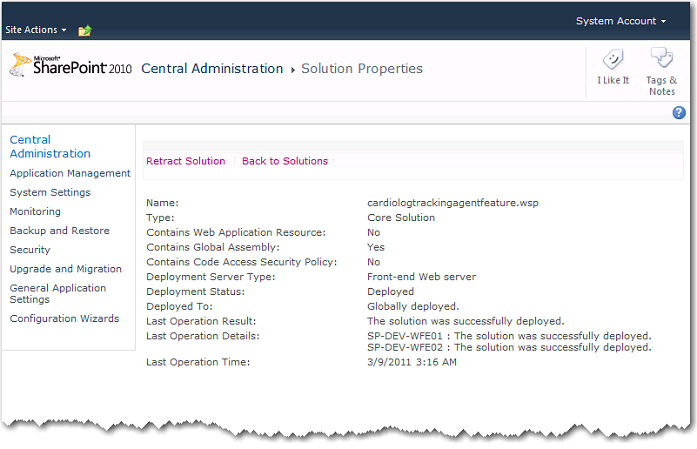 SharePoint 2010 - Solution Properties To view the deployed solution in MOSS 2007, go to Central Administration > Operations > Solution Management 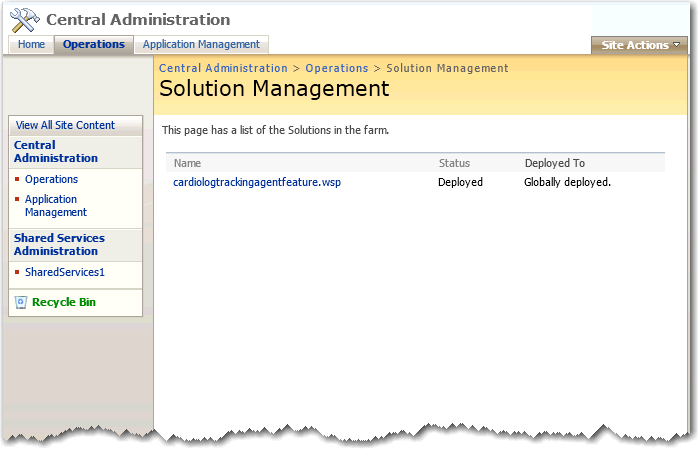 MOSS 2007 - Solution Management In the Solution Properties, click cardiologtrackingagentfeature.wsp and verify that the solution was successfully deployed to all web front ends. 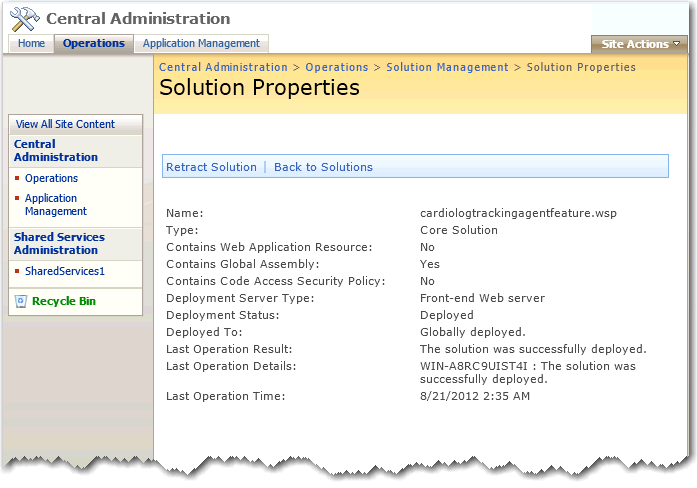 MOSS 2007 - Solution Properties Activate/Deactivate Data CollectionUpon installing the CardioLog Analytics feature, it is automatically activated and data is being collected. To deactivate the CardioLog Analytics feature in SharePoint 2013, go to Central Administration > System Settings > Manage farm features 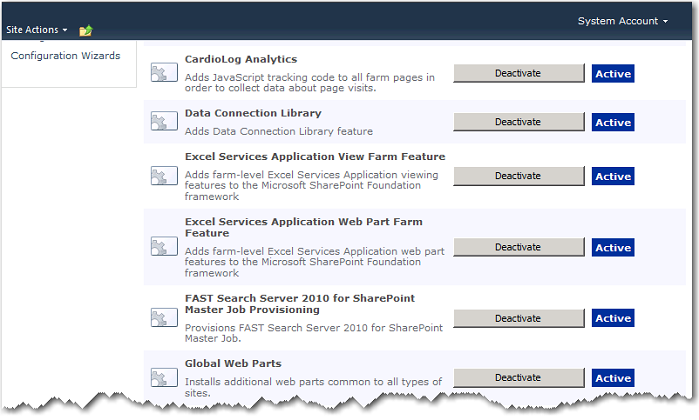 SharePoint 2010 - Manage farm features To deactivate the CardioLog Analytics feature in MOSS 2007, go to Central Administration > Operations > Manage farm features  MOSS 2007 - Manage farm features Note: The CardioLog Analytics SharePoint Feature will work only for master pages which contain the following control in the head section: <SharePoint:DelegateControl runat="server" ControlId="AdditionalPageHead" AllowMultipleControls="true"/> This control is included in the master pages for all SharePoint templates, besides the MOSS 2007 Publishing Site master page. Add this control to all MOSS 2007 Publishing Site master pages, right before the closing </HEAD> tag. Alternatively, you can also use a top master file which is included in all of the Publishing Sites master pages, in order to perform a single update. Uninstall ProcedureRemoving the "CardioLog Analytics" Feature using SharePoint Central Administration
Delete your browser cache and verify that when you browse the SharePoint website that you no longer see the CardioLog tracking agent popup when clicking on Ctrl+F12 on the keyboard or when clicking the Agent Console link (follow the instructions in http://cardiologserver:port/CardioLog/Configuration/AgentConsoleBoo... to add the agent console link to your browser). Removing the "CardioLog Analytics" Feature using Command LineExecute the following commands from command prompt in order to deactivate the feature, retract and remove the solution from your SharePoint farm (edit the directory path: 1X - 12 for MOSS 2007, 14 for SharePoint 2010, 15 for SharePoint 2013): cd C:\Program Files\Common Files\Microsoft Shared\Web Server Extensions\1X\BIN stsadm -o deactivatefeature -force -name "CardioLogAnalytics" stsadm -o uninstallfeature -force -name "CardioLogAnalytics" |
Which SQL versions are supported by CardioLog? | CardioLog supports SQL Server 2005, SQL Server 2008 and SQL 2012. |
What is included in CardioLog's architecture? | CardioLog is an integrated solution that includes monitoring and reporting for enterprise portals of various technologies. Unlike other web analytic tools, CardioLog offers statistical aggregations based on the logical structure of the portal, in addition to aggregations based on the physical structure (URL address tree). The CardioLog solution includes the following separate components:
|
What are the free reports included in CardioLog Lite? | The basic reports for CardioLog Lite are:
|
Can I use CardioLog with WSS 3.0 or SharePoint Foundation 2010? | WSS 3.0 is supported by both CardioLog and CardioLog Lite, while SharePoint Foundation 2010 is supported by CardioLog. |
Can I use CardioLog Lite with SharePoint 2003 or WSS 2.0? | CardioLog Lite does not support these older versions of Sharepoint or WSS. For these portals, use CardioLog Standard, Pro, or Enterprise editions |
Why do I receive the following error when I try to activate the license file: "ERROR: This access control list is not in canonical form and therefore cannot be modified." | Make sure you have installed CardioLog with an administrator account. If you still see the error message, follow these steps depending on the if you are running a 32-bit or 64-bit system:
|
Why do I receive a "Service Unavailable" message when I launch CardioLog? | Verify that ASP.NET is enabled in IIS, and that the CardioLog application pool account is a member of your local IIS_WPG group (for IIS 6.0 only). If you still receive a "Service Unavailable" message, then you need to reconfigure the CardioLog application pool identity:
|
If I host the CardioLog application on one server, and the CardioLog database on a second server, which one of the servers should be meet the system requirements? | The server that hosts the CardioLog Database should be the more powerful one, regarding processor speed, memory (RAM), and hard disk space. |
I have uninstalled CardioLog, but the tracking code has not been removed from my portal pages, why? | By design, some components are not removed when uninstalling the product, in order to ensure continuity of data collection. Execute the following steps to completely remove the remaining components:
|
What is the minimum server specification if the database is on a different physical server? | If the servers are isolated, disk drive space is not crucial. However, you should allocate at least 8GB of memory for CardioLog Pro, and at least 16GB of memory for CardioLog Enterprise. The amount of resources needed for the CardioLog web application and services depends on:
|
Is it possible to configure CardioLog with an existing database, as opposed to creating one during the installation? | This is possible, but differs depending on your existing infrastructure. Please contact us for more information and assistance. |
Why do I receive the error: "Cannot establish a connection to SQL Server" during installation? | Make sure your SQL server allows remote connections. You can test the connection to the SQL server by using a UDL file: If you are using a SQL alias, you can configure it on the CardioLog application server using the clicnfg.exe utility. Please note that the account used for installing CardioLog should have the following SQL roles and permissions:
|
Why do I receive the error "Login failed for user 'NT AUTHORITY\ANONYMOUS LOGON'"? | If your SQL server is hosted on a remote machine, make sure that the CardioLog application pool identity is assigned a domain user that has been assigned a db_owner role for the CardioLog database. |
Which one of our SharePoint farm servers should we run the setup file on? | You can install CardioLog on any SharePoint farm server (App / Front End / SQL) that meets the system requirements. |
Does CardioLog work with SharePoint 2003? | The CardioLog commercial editions support SharePoint 2003, 2007 and 2010. |
Do I need extra hardware in order to install CardioLog? | CardioLog Standard and Professional Editions can be hosted on your existing hardware. To ensure optimal operation, it is recommended to host the CardioLog Enterprise Edition on a dedicated x64 application server. The CardioLog SQL database can be hosted either on the application server, or on an external SQL server or cluster. See the full system requirements for more information. |
Can I install CardioLog on a virtual server? | Yes. CardioLog can be installed on a virtual server as long as the system requirements can be met. |
Why do I receive a "HTTP Error 500 - Internal Server Error" message when I launch CardioLog? | When Installing CardioLog on Windows Server 2008 or Windows Server 2012, verify that the required Web Server Role Services are installed as detailed below Depending on your server version, install the following role services: Windows Server 2012, Windows Server 2012 R2:
Windows Server 2008:
Windows Server 2008 R2
|