

Behavioral targeting enables you to sense your visitors' online behavior and dynamically change your website, automatically delivering customized content designed to positively engage them.
- Create rules that define which content is displayed for each visitor segment.
- Use our Visual Wizard to easily establish these rules by clicking on the relevant parts of a page and setting alternative content.
- Pause and restart personalization rules whenever you like.


Behavioral targeting main user interface
Note - Do not apply more than one rule to the same user interface (UI) element on a certain page. This includes Behavioral Targeting rules and Optimization test rules. If a specific UI element has more than one rule it will apply the first one it finds. If it has one rule for a simple segment and another for an advanced segment (based on personal information), it will always use the simple one because personal information is always loaded last from our servers.
The following examples are taken from a demonstration environment:
- Pages - The page you wish to personalize.
Behavioral Targeting Pages dialog
- UI Elements - A UI element is actually a User Experience (UX) action, meaning you can create a personalization rule for any kind of user experience element. It can be a real UI element such as the welcome banner, the footer or even a different user experience like a popup.
Behavioral Targeting UI Elements dialog
- Segments - A segment is built from one or more conditions: Traffic source, Visitor Type, Goals, Visits, Last seen, Browser and OS, User agent, Country, URL, Referrer, Cookie, AB or MVT Test.
Behavioral Targeting Segments dialog
Let's look at two simple examples:
- You would like to show an alternate welcome banner along with a call to action text for visitors from a specific traffic source. This is a simple personalization rule where you choose the page, the UI elements (ie. welcome banner and call for action button), and the values for each UI element. For the welcome banner, specify an image path, and for the call to action simply enter the text you would like to show.
- You would like to show a popup message with a special promotion for visitors from England, who have never converted (completed a goal before). In this case, instead of selecting a UI element, choose to create a custom JavaScript code that opens the popup with the relevant text. This can be done using our JavaScript agent.
Our JavaScript agent receives the relevant sets of rules from our server based on the page the user is currently viewing, and then identifying and categorizing the user to the relevant segments. It then decides which UI elements to change, and completes the request.
Before personalizing content on the page, you must initially define the UI elements to personalize. You only have to do this once per page. This can be performed by providing the unique id of each UI element on the page. If your UI elements do not have an HTML ID attribute, you can define them by providing the HTML path. It is important to mention that you do not have to know HTML to define UI elements, you can simply select the element through our back office.
How to Create Personalized Content
Click Add Personalized Content from the upper right hand corner.
- In the popup dialog, fill in the Page parameter by opening the object explorer and selecting an item.
- Choose or Create new UI Element. This option only appears after a page has been chosen.
- Choose the Visitor Segment you would like to target.
- Give it a Title.
- Define the Personalized Content items you would like to include.
- Click Save.
In the example below, the Home banner as defined in UI Elements and described in Personalized Content (html source) will appear differently for the mobile users segment.
Add Personalized Content Dialog
How to create a new UI element
- In the Add Personalized Content dialog, click Create a new UI Element.
Note - UI Elements can be also created from the A/B and Multivariate Testing dialog.

Create a New UI Element Window - Once clicking Create a new UI Element, a new window will open with your selected site item.
You can select a UI Element by simply hovering the cursor over your site elements and clicking on one of them. Additionally, you can manually enter a UI Element by clicking on the Manual Creation link at the top left corner of the page.
The second link - Create JavaScript Element - allows you to add JavaScript code to the page. For example, if the you have a popup you want to show visitors based on SEO, you can add a JavaScript call that will display the popup to specific viewer segments.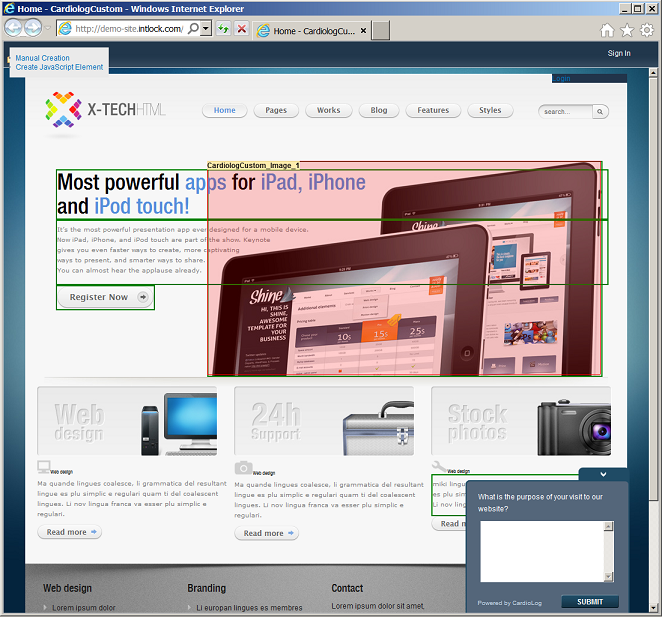
UI Elements
Please note that the SharePoint Marketing Suite uses the UI element ID to locate it on the page. If the UI element does not have an ID, then the SharePoint Marketing Suite has another option which is to use the element HTML location. This option is not as reliable as using the ID, but still functions appropriately if needed. If there is no ID for the chosen UI element, the following popup window will appear, click OK to continue using the UI element HTML location, or click Cancel.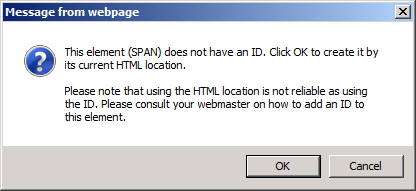
No UI element ID for the chosen UI element
- After clicking on the selected UI Element, a new window will appear. Enter the title for the UI Element. The element you have selected should be shown in the Add Personalized Content dialog (ex. Welcome Banner).

Create a new UI Element
Add Personalize Content
- Select Segment from the available Segments drop down list

Segments Drop-down Menu - Click Save.